
1. Introduction to Surface Finish in Plastic Injection Molding
This section will set the stage by defining surface finish, explaining its importance, and introducing the common issues that plague it.
1.1. What is Surface Finish and Why Does it Matter?
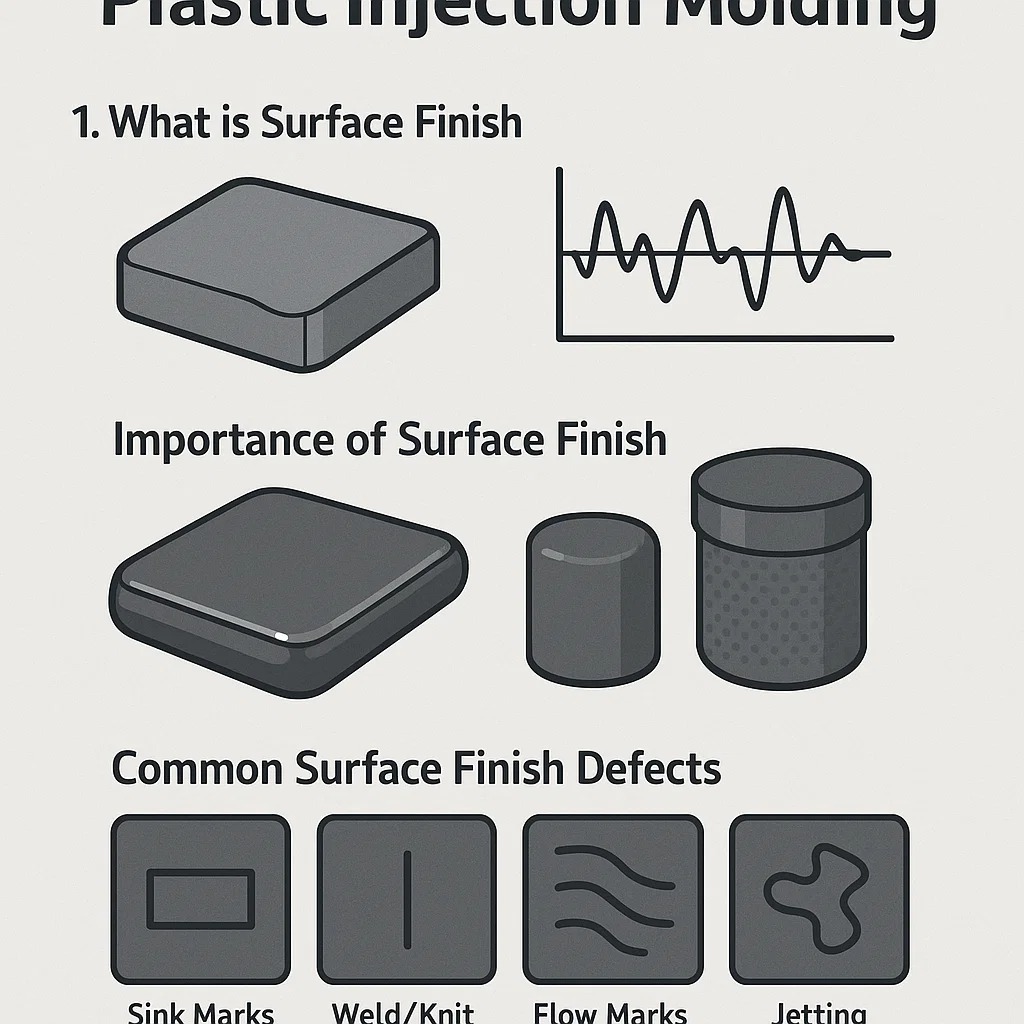
- Definition: The surface finish of a plastic injection molded part refers to the texture, smoothness, or contour of the component’s exterior. It is a direct reflection of the mold cavity’s surface.
- Measurement: The quality of a surface finish is quantified using roughness parameters, most commonly the Average Roughness (R a ) , which measures the average deviation of the profile from the mean line. Lower R a values indicate a smoother surface.
- Industry Standard: The plastics industry often uses the SPI (Society of the Plastics Industry) Surface Finish Classification , which ranges from Mirror (A-grades) to Matte/Dull (D-grades). Specifying an SPI grade is standard practice when designing a mold.
* *Example:* An SPI A-1 finish requires diamond buffing** and produces a mirror-like finish, whereas a D-3 finish is achieved by dry blasting with #240 grit aluminum oxide** and results in a dull, non-reflective surface.1.2. Importance of Surface Finish in Product Aesthetics and Functionality
The surface finish is not just an aesthetic feature; it is critical for product performance and acceptance:
- Aesthetics: High-quality, consistent surface finishes—like glossy, matte, or textured—are key for brand perception and consumer appeal in products like consumer electronics and automotive interiors.
- Functionality:
- Tactile Feel: Texture affects the way a user interacts with the product (e.g., a non-slip grip).
- Light Reflection: A smooth, glossy finish can minimize light scattering, essential for lenses and displays (e.g., PMMA parts).
- Wear and Friction: A textured surface can sometimes improve durability or reduce friction in moving parts.
- Cleanliness/Sterilization: Very smooth surfaces are often required for medical devices to prevent bacterial growth and allow for easy sterilization.
- Adhesion: Certain finishes are necessary to ensure proper adhesion of coatings or paint .
1.3. Common Surface Finish Defects in Injection Molding
Surface finish quality can be compromised by numerous defects, which you will detail in Section 4. Here’s a brief introduction to the most common ones:
- Sink Marks: Depressions on the surface caused by material shrinkage in thicker sections of the part.
- Weld/Knit Lines: Visible lines where two or more melt fronts meet and fail to fully fuse, appearing as a surface flaw and a structural weakness.
- Flow Marks: Wave-like patterns, streaks, or visible lines on the surface caused by non-uniform filling of the mold cavity.
- Jetting: A snake-like surface feature that occurs when molten plastic is pushed through a small gate opening at a high speed, solidifying before it can adhere properly to the mold wall.
- Orange Peel: A ripple-like, pitted surface finish resembling an orange peel, often caused by material or mold temperature issues.
2. Factors Affecting Surface Finish
The final surface finish is a result of complex interactions between the material, the mold tooling, and the processing conditions. Optimizing all three areas is essential for achieving the desired R a value or SPI grade.
2.1. Material Selection
The choice of resin is perhaps the most fundamental factor influencing the achievable surface finish.
2.1.1. Influence of Resin Type (ABS, PC, PP, etc.)
- Amorphous vs. Semi-Crystalline: Amorphous polymers (like PC , PMMA , and ABS ) typically yield much better, higher-gloss surface finishes because they shrink more uniformly and predictably. Semi-crystalline polymers (like PP , PE , and POM ) tend to have higher and less uniform volumetric shrinkage, resulting in lower gloss, duller, or wavy surfaces (often causing the “Orange Peel” effect).
- Melt Viscosity: Resins with lower melt viscosity (greater flowability) are better at replicating the intricate surface texture of the mold, leading to a higher-quality finish.
2.1.2. Impact of Additives and Fillers
- Fillers: The inclusion of fillers like glass fibers, carbon fibers, or mineral additives dramatically reduces the achievable surface finish quality. These rigid materials disrupt the flow of the polymer melt and tend to push through the surface layer, leading to exposed fibers and a dull, rough finish.
- Colorants and Pigments: While generally having a minor impact, highly concentrated pigments or specific color additives can alter melt flow and lead to slight variations in surface texture or color streaks.
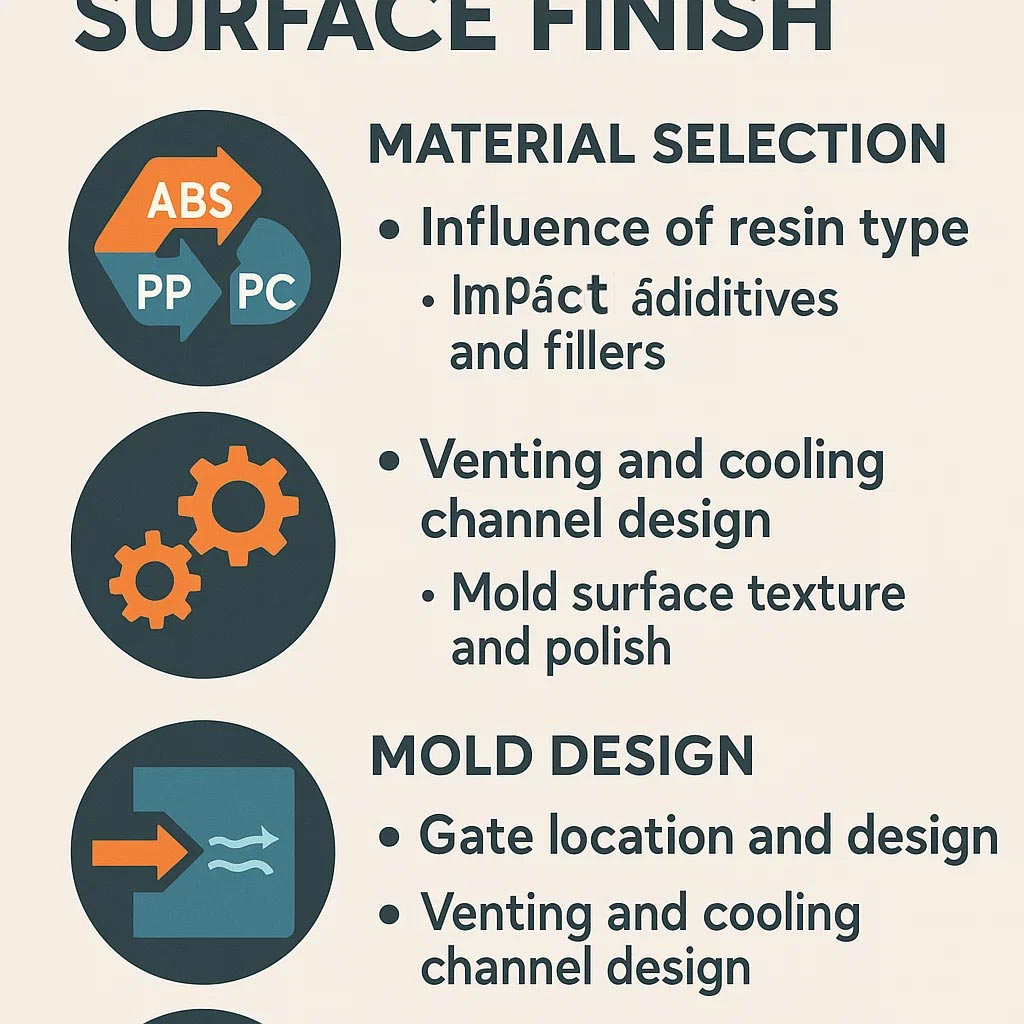
2.2. Mold Design
The mold itself is a negative imprint of the final part, and its design dictates how the polymer flows, packs, and cools.
2.2.1. Gate Location and Design
- Criticality: The gate is the entry point for the molten plastic, making its location and size vital.
- Gate Effects: Poor gate design or location can lead to defects like jetting, flow marks, and weld lines . Gates should be positioned in the thickest section of the part to allow for maximum packing and minimize sink marks.
- Gate Type: Fan gates or diaphragm gates often result in better surface finishes than small pinpoint gates because they allow for smoother, less turbulent flow into the cavity.
2.2.2. Venting and Cooling Channel Design
- Venting: Inadequate venting traps gases, which can lead to burn marks, splay marks (silver streaks) , and poor surface replication due to compressed air resistance. Vents must be strategically placed at the last areas to fill.
- Cooling: Uniform and efficient cooling channels are essential for consistent shrinkage and surface quality. Non-uniform cooling causes differential shrinkage, which is a major contributor to warpage and surface imperfections like sink marks and wavy surfaces .
2.2.3. Mold Surface Texture and Polish
- Direct Replication: The mold’s surface is directly replicated onto the plastic part. The quality of the mold steel polish or texture is the ceiling for the part’s surface quality.
- Mold Polishing: Precision polishing using diamond paste or abrasive stones is required for mirror-finish parts (SPI A-grades).
- Surface Texturing: Techniques like chemical etching or laser texturing create durable, specific textures (e.g., leather grain, matte finishes) that hide defects and improve grip.
2.3. Processing Parameters
Once the material and mold are set, the machine’s operating parameters provide the final means of optimization.
2.3.1. Melt Temperature
- Effect: A higher melt temperature lowers the viscosity of the polymer, allowing it to flow more easily and conform more closely to the mold surface features, generally resulting in a smoother, higher-gloss finish and reducing flow marks.
- Caution: Excessively high temperatures can cause material degradation, leading to defects like splay and burning .
2.3.2. Injection Speed and Pressure
- Speed: Injection speed must be balanced. Too slow, and the plastic cools prematurely, causing flow lines and weld lines . Too fast, and it can cause jetting near the gate or flashing .
- Pressure (Holding/Packing): Holding pressure is crucial. High pressure during the cooling phase packs extra material into the cavity, compensating for shrinkage. Proper packing pressure is the primary defense against sink marks and ensures a crisp surface detail replication.
2.3.3. Mold Temperature
- Effect: A higher mold temperature keeps the plastic melt flowable for a longer period, allowing the polymer chains to relax and replicate the mold surface more accurately, often yielding the best surface gloss and finish. This also helps reduce shear stress, preventing defects like blush and orange peel .
- Trade-off: High mold temperatures increase the cycle time , as the part takes longer to cool sufficiently for ejection.
2.3.4. Cooling Time
- Effect: Sufficient cooling time is necessary to solidify the outer skin of the part under pressure. Premature ejection can lead to stress marks, warpage, and scratches (ejection marks) that ruin the surface finish.
3. Techniques for Improving Surface Finish
Achieving a high-quality surface finish often requires implementing specific techniques related to tooling, secondary processes, and specialized machinery.
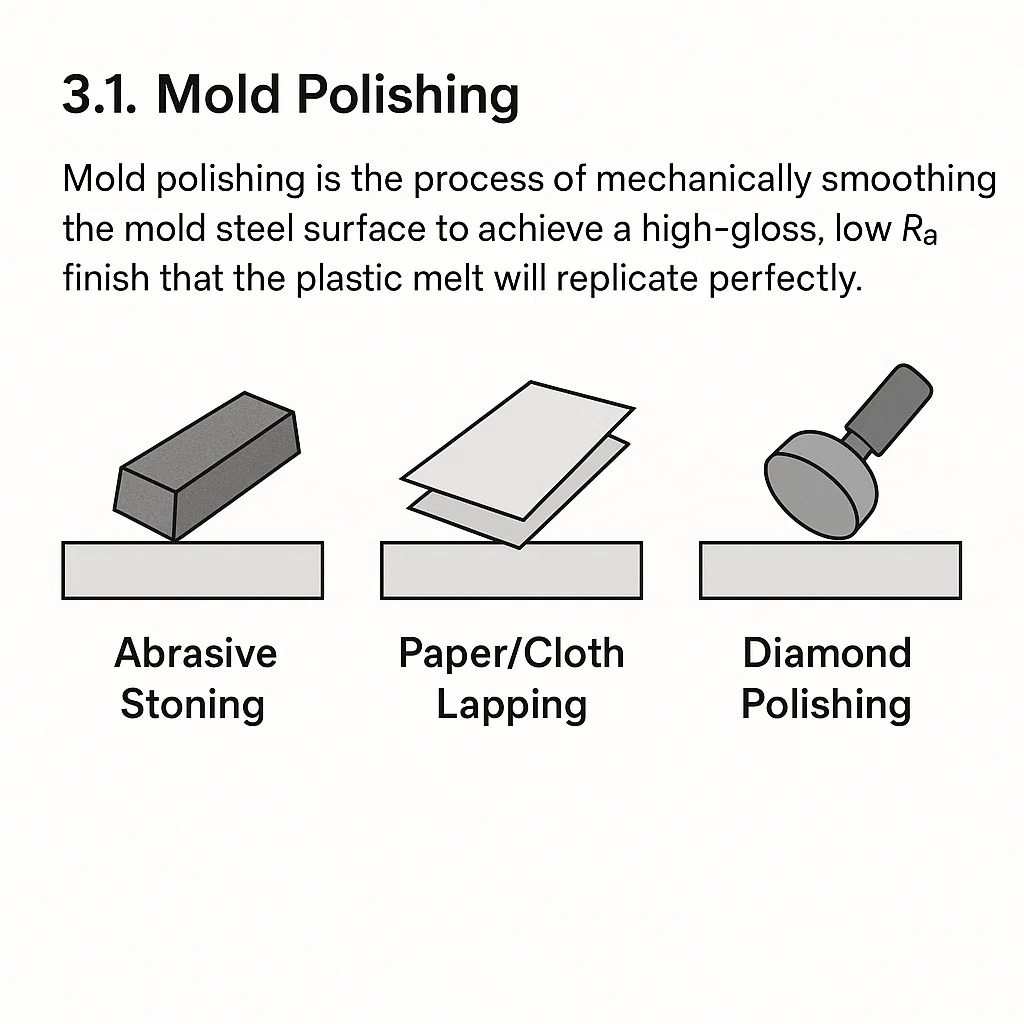
3.1. Mold Polishing
Mold polishing is the process of mechanically smoothing the mold steel surface to achieve a high-gloss, low R a finish that the plastic melt will replicate perfectly.
3.1.1. Different Polishing Methods (Diamond, Abrasive Stones)
- Abrasive Stoning: Initial shaping and removal of machining marks are done using coarse abrasive stones (e.g., silicon carbide or aluminum oxide).
- Paper/Cloth Lapping: Finer polishing is achieved with diamond compounds or specialized papers, moving sequentially through finer grits.
- Diamond Polishing: For the highest mirror-like finishes (SPI A-1, A-2), the final stages involve diamond paste and specialized cloth/felt bobs. This is highly skilled work performed under magnification.
3.1.2. Achieving Specific Ra Values and SPI Grades
The level of polish directly corresponds to the quantifiable R a value (Average Roughness) and the qualitative SPI finish grade:
| SPI Grade | Polish Method | Ra Value ( µ in) | Typical Application |
|---|---|---|---|
| A-1 | Grade #3 Diamond Buff | 1 | Lenses, Optical Parts |
| B-2 | #600 Grit Stone | 6-8 | High Gloss Parts, Displays |
| C-3 | #600 Emery Paper | 10-12 | General Purpose, Semi-Gloss |
| D-1 | #10 Sandpaper/Dry Blast | 25-32 | Matte Texture, Hidden Parts |
3.2. Surface Texturing
Texturing deliberately introduces a pattern or roughness to the mold surface to achieve a specific aesthetic or functional finish. This is commonly used to hide defects like flow marks or sink marks.
3.2.1. Chemical Etching
- Process: The mold steel is masked with a protective film in the desired pattern, and then immersed in an acid bath. The acid eats away (etches) the exposed steel, creating the texture.
- Pros: Creates deep, uniform, durable textures (e.g., wood grain, leather grain).
3.2.2. Laser Texturing
- Process: A high-precision laser ablates (vaporizes) material from the mold surface to create extremely fine, accurate, and repeatable patterns.
- Pros: Allows for intricate, micro texturing or even nano texturing (see Section 8), and is ideal for complex 3D shapes.
3.2.3. Bead Blasting
- Process: Fine glass beads or other abrasive media are propelled against the mold surface at high pressure.
- Pros: Produces a uniform, dull, matte, or satin finish (often SPI D-grades). It’s a fast, cost-effective way to remove gloss and hide surface imperfections.
3.3. Coating and Painting
These are secondary processes applied to the molded part after it has been ejected, used to add color, gloss, or specialized functional properties.
3.3.1. Types of Coatings (e.g., UV, Anti-Scratch)
- UV Coating: A clear coat cured under UV light. Used extensively on Polycarbonate ( PC ) and Acrylic ( PMMA ) parts to restore a high-gloss finish or improve outdoor weather resistance.
- Anti-Scratch/Hard Coating: Applied to softer plastics (like PC) to increase surface hardness and scratch resistance, crucial for lenses and display covers.
3.3.2. Painting Techniques (Spray, Powder Coating)
- Spray Painting: Standard technique for achieving precise color matches and controlled gloss levels on plastic components.
- Powder Coating: While traditionally for metal, specialized low-temperature powder coatings are now used on some plastics to provide a durable, uniform finish.
3.4. Gas-Assisted Injection Molding
- Technique: An inert gas (usually nitrogen) is injected into the mold cavity after the plastic has partially filled it.
- Benefit: The gas core applies internal pressure, which helps to pack the plastic melt from the inside out , effectively eliminating sink marks on the external surface.
3.5. Hot Runner Systems
- Technique: A heating system maintains the molten plastic temperature right up to the gate, eliminating the need for a cold sprue/runner.
- Benefit: Keeps the plastic melt extremely consistent and allows for easier control over packing, which minimizes stress and leads to better surface gloss and elimination of flow marks .
3.6. Mold Temperature Control Technologies
- Technique: Beyond standard water/oil cooling, high-precision heating systems (e.g., steam heating, induction heating, or specialized fluid systems) are used to rapidly cycle the mold surface temperature.
- Benefit: By raising the mold temperature during filling (to achieve high gloss) and then rapidly dropping it for cooling (to minimize cycle time), these technologies allow processors to achieve mirror-like finishes even with less flowable materials, virtually eliminating defects like weld lines and orange peel .
4. Common Surface Defects and Their Solutions
Surface defects are visual or tactile flaws that compromise the quality of the molded part. Identifying the root cause—whether it’s material, mold, or process—is the key to effective correction.
4.1. Sink Marks
A sink mark is a localized depression or dimple on the surface of a thick part section.
| Causes | Prevention/Solution |
|---|---|
| Shrinkage: Insufficient material packed into the mold to compensate for volumetric shrinkage during cooling. | Increase Holding Pressure: The most effective fix is to increase the holding (packing) pressure and time to force more material into the mold. |
| Non-Uniform Wall Thickness: Thicker sections cool slower, causing the interior material to pull the surface inward. | Design: Redesign the part to maintain uniform wall thickness. Use internal ribs or coring to reduce bulk. |
| High Melt/Mold Temperature: Excessive heat can increase shrinkage. | Lower Melt/Mold Temperatures: Run temperatures just high enough to fill the part, reducing total shrinkage. |
4.2. Weld Lines (Knit Lines)
A weld line is a visible line formed where two or more flowing melt fronts meet and fuse but do not blend perfectly.
| Causes | Prevention/Solution |
|---|---|
| Low Temperature: The melt fronts are too cool when they meet, preventing complete molecular inter-diffusion. | Increase Melt/Mold Temperature: Higher temperatures allow the plastic to remain molten longer, facilitating better fusion and reducing the visibility of the line. |
| Insufficient Pressure: Lack of pressure to force the two fronts together. | Increase Injection Speed and Pressure: Fast injection minimizes cooling before meeting. |
| Air Trapping: Gas or air trapped at the meeting point. | Improve Venting: Add or deepen vents at the weld line location to allow trapped air to escape. |
4.3. Flow Marks (Flow Lines)
Flow marks are streaky, wave-like lines or patterns visible on the surface, often radiating from the gate.
| Causes | Prevention/Solution |
|---|---|
| Slow or Varying Flow: The molten plastic cools against the mold wall as it flows, creating visible layers. | Increase Injection Speed: Fill the cavity rapidly to ensure the melt front stays hot and fluid. |
| Low Mold Temperature: A cold mold solidifies the first contact layer of plastic too quickly. | Increase Mold Temperature: A hotter mold keeps the surface plastic molten longer, allowing the flow lines to dissipate. |
| Gate/Runner Geometry: Restricted or poorly designed runners/gates cause turbulent flow. | Enlarge Gate/Runner: Widen the gate to reduce shear stress and allow a smoother entry flow. |
4.4. Jetting
Jetting occurs when the molten plastic is squirted through a small gate into an open mold cavity, solidifying as a snaking stream before the rest of the cavity fills.
| Causes | Prevention/Solution |
|---|---|
| High Injection Speed: Fast flow rate through a restrictive gate. | Decrease Injection Speed: Slow down the initial injection velocity. |
| Poor Gate Design: The gate is positioned in a thick area or directs the melt stream straight into a large open space. | Redesign Gate: Use a sub-gate or tab gate that directs the flow against a mold wall or a core pin, allowing the melt stream to “fan out” immediately upon entering the cavity. |
4.5. Orange Peel
Orange peel is a surface that looks like the skin of an orange—a rippled or pitted appearance.
| Causes | Prevention/Solution |
|---|---|
| Mold Temperature Difference: Extreme temperature differential between the plastic melt and the mold surface. | Increase Mold Temperature: A hotter mold surface allows the material to fully replicate the mold surface before solidifying. |
| Material Degradation/Moisture: Excessive moisture in the material can lead to gassing at the surface. | Pre-dry Material: Ensure the resin is dried to the manufacturer’s specification. |
| Low Melt Viscosity: Plastic is too hot and doesn’t hold its shape when it contacts the mold. | Slightly Reduce Melt Temperature: Adjust the melt temperature to improve viscosity without causing flow marks. |
4.6. Blush (Gate Blush)
Blush is a localized area of dullness or cloudiness, usually occurring directly around the gate area.
| Causes | Prevention/Solution |
|---|---|
| High Shear Stress: Caused by the material being forced too violently through a small gate. | Increase Gate Size: Reducing the restriction lowers the shear stress on the polymer. |
| Injection Speed: Very high injection speeds through the gate. | Reduce Injection Speed: Slow the initial injection speed down, often utilizing multi-stage profiling. |
| Lubricant Separation: Material additives/lubricants separate under high shear. | Try a Different Material Grade: Switch to a resin grade with better thermal stability or less additive content. |
5. Material Selection for Optimal Surface Finish
Material selection is the first and most crucial step in achieving a high-quality surface finish. The inherent properties of the polymer—specifically its molecular structure and shrinkage rate—determine how well it can replicate the mold surface.
5.1. Overview of Suitable Thermoplastics
Thermoplastics are categorized by their structure, which directly impacts their finished appearance: Amorphous polymers generally offer superior gloss and surface replication, while Semi-Crystalline polymers typically have a duller finish due to greater, less uniform shrinkage.
5.1.1. Acrylic (PMMA)
- Structure: Amorphous
- Finish Capability: Excellent. PMMA (Polymethyl Methacrylate) is known for its exceptional clarity and ability to achieve a very high-gloss, mirror-like finish (ideal for SPI A-1). It is often used for optical components, lenses, and display covers.
- Challenge: Highly susceptible to crazing and stress cracking if molded incorrectly or exposed to certain chemicals.
5.1.2. Polycarbonate (PC)
- Structure: Amorphous
- Finish Capability: Excellent. PC provides a tough, high-impact surface that can also achieve a brilliant, high-gloss finish . Its high viscosity requires proper molding temperatures but results in good surface replication.
- Challenge: Must be thoroughly dried (hydroscopic) to prevent hydrolysis, which can lead to splay marks and poor surface quality.
5.1.3. Acrylonitrile Butadiene Styrene (ABS)
- Structure: Amorphous
- Finish Capability: Very Good. ABS is the workhorse engineering polymer, offering a good balance of mechanical properties and a high-quality cosmetic finish . It is easily textured (via etching/blasting) and readily accepts painting and plating (e.g., chrome).
- Challenge: Highly prone to sink marks in thicker sections due to its moderate shrinkage.
5.1.4. Polypropylene (PP)
- Structure: Semi-Crystalline
- Finish Capability: Fair to Good. As a semi-crystalline resin, PP typically exhibits higher, less uniform shrinkage, resulting in a duller, lower-gloss finish compared to amorphous resins. It is also more prone to flow lines and the orange peel effect.
- Advantage: Used where toughness and chemical resistance are paramount, and a matte or textured finish is acceptable.
5.1.5. Polystyrene (PS)
- Structure: Can be Amorphous (General Purpose PS or GPPS) or a blend (High-Impact PS or HIPS).
- Finish Capability: Good (GPPS). GPPS is amorphous and provides excellent gloss and rigidity, making it suitable for clear or highly cosmetic parts (e.g., disposable drinkware). HIPS is less glossy due to additives but is tougher.
- Challenge: Brittle compared to ABS or PC.
5.2. Comparing Surface Finish Capabilities of Different Materials
| Property | PMMA (Acrylic) | PC (Polycarbonate) | ABS | PP (Polypropylene) | PS (Polystyrene) |
|---|---|---|---|---|---|
| Structure | Amorphous | Amorphous | Amorphous | Semi-Crystalline | Amorphous |
| Max Gloss | Excellent (Highest) | Excellent | Very Good | Fair (Low) | Good |
| Shrinkage Rate | Low | Low | Moderate | High (Non-uniform) | Low to Moderate |
| Texture Acceptability | Fair (Sensitive) | Good | Excellent | Good | Good |
| Defect Proneness | Crazing | Splay/Moisture | Sink Marks | Orange Peel/Warpage | Brittleness |
5.3. Considerations for Material Compatibility with Surface Treatments
When selecting a material, it is vital to consider any planned secondary surface treatments:
- Adhesion: Some polymers, particularly Polypropylene (PP) and Polyethylene (PE) , have very low surface energy, making it difficult for paints and coatings to adhere. These often require pre-treatment processes like flame treatment or plasma treatment before painting.
- Solvent Resistance: Amorphous resins like PC and PMMA are susceptible to chemical attack and stress cracking from many common solvents found in paints or adhesives. Specialized, non-aggressive coatings must be used.
- Platability: ABS is often the material of choice for parts requiring chrome plating (e.g., automotive trim) because its structure allows for superior adhesion of the metal finish.
6. Case Studies: Surface Finish Improvement in Injection Molding
These case studies illustrate how specific attention to material, tooling, and process parameters can overcome challenges and achieve stringent surface finish requirements across different industries.
6.1. Automotive Components
Challenge: Class A Automotive Exterior Panels
Automotive exterior panels (e.g., body panels, pillar trims) require a “Class A” surface finish : a high-gloss, aesthetically perfect, blemish-free surface that is ready for painting. This finish must be consistent across large surface areas.
- Solution Implemented:
- Material: Use of highly engineered ABS/PC blends with very low shrinkage rates.
- Tooling: Employing SPI A-1 (mirror) polish on the mold steel, followed by a protective hard coating to maintain the finish over thousands of cycles.
- Process: Utilizing Rapid Temperature Cycling (RTC) technology (Mold Temperature Control Technologies, Section 3.6). This heats the mold surface rapidly during injection (improving flow and gloss, eliminating weld lines) and cools it quickly for fast cycle times.
Result:
Near-perfect gloss uniformity and the virtual elimination of flow marks and weld lines, reducing the need for extensive post-molding finishing and painting preparation.
6.2. Consumer Electronics
Challenge: High-Gloss Smartphone Casings
Modern smartphone and device casings require a deep, scratch-resistant gloss finish while often having complex geometries (e.g., thin walls, multiple internal ribs).
- Solution Implemented:
- Material: High-flow, UV-stabilized Polycarbonate (PC) , selected for its strength and high-gloss capability.
- Design: Careful implementation of Gas-Assisted Injection Molding (Section 3.4) to hollow out internal thick sections (bosses), effectively preventing sink marks on the thin, highly visible exterior surface.
- Post-Molding: Application of a protective Anti-Scratch/UV Coating (Section 3.3.1) to meet consumer durability requirements without compromising the high surface gloss achieved during molding.
Result:
Casings maintain a high-gloss, mirror-like finish despite underlying structural features, coupled with the required resistance to daily wear and tear.
6.3. Medical Devices
Challenge: Smooth, Sterilizable Pump Housings
Medical devices, such as dialysis or drug pump housings, require extremely smooth, non-porous surfaces for ease of cleaning, sterilization, and to prevent bio-film accumulation.
- Solution Implemented:
- Material: Medical-grade, low-extractable Polypropylene (PP) or high-grade ABS , chosen for biocompatibility.
- Tooling: The mold cavity is polished to an SPI A-2 or A-3 finish (low R a values) to ensure minimal surface roughness.
- Process: Running a high mold temperature (Section 2.3.3) to maximize the flow of the plastic and ensure complete replication of the smooth mold surface, which minimizes microscopic pores or knit line visibility.
Result:
Parts achieve a low R a value, creating a surface that is easy to sanitize, meets stringent medical regulatory standards, and prevents surface contamination.
7. Troubleshooting Surface Finish Issues
When surface defects occur, relying solely on intuition is often inefficient and costly. A systematic, scientific approach is required to identify the root cause and optimize the process for a permanent solution.
7.1. Systematic Approach to Identifying Root Causes
Troubleshooting should follow a clear, step-by-step methodology:
- Define and Document the Defect: Clearly identify the defect (e.g., sink mark, flow mark, jetting) and its location, frequency, and severity. Collect samples and photographic evidence.
- Review Material Specs: Verify that the resin is correctly dried (especially hydroscopic resins like PC or ABS ), is not contaminated, and is the correct grade specified for the job.
- Inspect Tooling: Check the mold for damage, insufficient venting, debris in the cavity, or inconsistencies in the mold surface finish itself. Ensure the mold temperature control systems are functioning correctly and providing uniform temperatures.
- Analyze Processing Parameters (The 6 M’s): Systematically check and record the following variables, which are common root causes of defects:
- Material: Moisture, temperature, viscosity.
- Mold: Temperature, cooling uniformity, venting.
- Machine: Screw speed, barrel temperature profile.
- Method (Process): Injection speed, holding pressure, cycle time.
- Manpower: Operator consistency and procedures.
- Measurement: Consistency of QC checks and equipment calibration.
- Isolate and Adjust: Implement one processing change at a time (e.g., increase mold temperature by 5 °C ), monitor the result, and document the outcome. Never adjust multiple variables simultaneously.
7.2. Using Design of Experiments (DOE) for Optimization
For complex defects where multiple factors might interact, the Design of Experiments (DOE) methodology provides a statistically rigorous path to optimization.
- What is DOE? DOE is a formal method for planning, executing, and analyzing tests to determine how different factors (e.g., melt temperature, injection speed, mold temperature) affect the output characteristic (the surface finish quality, measured by R a or defect count).
- The Power of Interaction: DOE can identify not just the effect of individual factors but also the interaction effect —for example, how high melt temperature and low injection speed might collectively worsen a defect like jetting more than either factor alone.
- Implementation: By running a limited number of structured experiments, DOE can quickly define the “process window”—the optimal range of processing parameters that reliably yield the desired surface finish.
7.3. Process Monitoring and Control
The best troubleshooting is prevention, which relies on consistent monitoring:
- Closed-Loop Control: Using modern injection molding machines with closed-loop control systems ensures that critical parameters like melt temperature , mold temperature , and injection velocity remain stable throughout the production run, preventing drift that leads to inconsistent surface finish.
- In-Line Measurement: For highly critical parts (e.g., optical components), using in-line measurement systems (like vision systems or roughness testers) can detect surface defects or dimensional issues immediately, allowing operators to correct the process before producing excessive scrap.
- Preventative Maintenance: Regular cleaning and maintenance of the mold, especially the vents and cooling channels, is essential to prevent built-up residue or scaling that causes hot spots and inconsistent surface quality.
8. Emerging Trends in Surface Finish Technology
The drive for higher performance and novel aesthetics is pushing the boundaries of plastic surface technology, focusing on micro-scale precision and enhanced material functionality.
8.1. Micro and Nano Texturing
Moving beyond traditional chemical etching, next-generation texturing techniques leverage extreme precision to create functional surfaces.
- Process: Achieved primarily through Laser Texturing (Section 3.2.2) or specialized, ultra-precise machining of the mold insert.
- Micro Texturing: Features typically range from 1 to 1000 µm . Used to create functional surfaces such as:
- Anti-Glare/Anti-Reflective surfaces for displays and optics.
- Hydrophobic/Self-Cleaning surfaces (mimicking the Lotus effect) by optimizing surface roughness to repel water.
- Nano Texturing: Features are below 100 nm. This is used to engineer light-scattering properties for advanced anti-counterfeiting features or extremely fine aesthetic details that cannot be seen with the naked eye.
8.2. Self-Healing Polymers
The ultimate solution for maintaining a pristine surface finish is a material that can repair itself.
- Concept: These are polymers that contain micro-capsules filled with a healing agent. When the surface is scratched or cracked, the capsules rupture, releasing the agent, which then polymerizes (cures) to fill the gap.
- Benefit: Provides permanent defense against common surface flaws like minor scratches and scuffs, significantly improving the longevity of the cosmetic finish on items like automotive coatings and consumer electronics.
- Current Status: While still emerging, these materials are already being implemented in specialized coatings and high-end applications.
8.3. Sustainable Materials and Surface Finishes
Increasing regulatory and consumer pressure is driving innovation toward environmentally friendly materials that still meet high surface quality demands.
- Bio-based and Recycled Polymers: The challenge is that recycled and bio-based resins often contain impurities or variations in molecular weight that can negatively impact gloss and texture, leading to defects like splay or flow marks .
- Solution Focus: Utilizing high mold temperature control and optimized melt flow additives to compensate for the lower consistency of sustainable materials, thereby preserving the required aesthetic finish.
- Water-Based Coatings: Transitioning away from solvent-heavy (VOC-rich) coatings to environmentally friendly water-based systems for post-molding painting, ensuring that the coating adheres properly to the plastic substrate without causing chemical stress or degradation.
9. Conclusion
9.1. Key Takeaways for Achieving High-Quality Surface Finish
Achieving an optimal surface finish in plastic injection molding is not a single-step process but a result of synchronized efforts across three core domains:
- Material Mastery: The choice between amorphous resins ( PC, PMMA, ABS ) for superior gloss and the inherent challenges of semi-crystalline resins ( PP, PE ) is fundamental. Always ensure proper material drying and preparation.
- Tooling Precision: The mold dictates the maximum achievable finish. Investing in appropriate mold polishing (to a specific R a value or SPI grade ) or applying high-precision surface texturing (chemical or laser) is essential. Proper venting and uniform cooling channel design are non-negotiable for preventing defects.
- Process Optimization: The final finish is tuned by processing parameters . High mold temperature and controlled injection speed/pressure are the primary levers used to eliminate defects like sink marks , weld lines , and flow marks . Use systematic troubleshooting methods like DOE to lock in optimal parameters.
The most successful projects recognize that surface quality is a function of the entire system—material, mold, and machine—working in harmony.
9.2. The Future of Surface Finish in Plastic Injection Molding
The industry is moving toward intelligent, integrated solutions:
- Functional Surfaces: The emerging trends of micro and nano texturing will transform plastic surfaces into functional interfaces that repel water, fight germs, or manipulate light, making the surface finish an active component of the product.
- Smart Processing: Advanced technologies like Rapid Temperature Cycling (RTC) and closed-loop process control will become standard, allowing manufacturers to consistently achieve mirror-like finishes even with complex geometries and challenging sustainable materials.
- Material Resilience: The implementation of self-healing polymers will fundamentally change how durability is viewed, ensuring aesthetic quality is maintained long after the part leaves the mold.
By staying abreast of these developments and maintaining rigorous process control, manufacturers can consistently deliver plastic components with world-class surface finish quality.
This comprehensive guide details how to achieve optimal Surface Finish in Plastic Injection Molding by balancing material selection, mold design, and processing parameters. It defines key metrics like R a values and the SPI finish scale, then explores techniques such as mold polishing, laser texturing, and advanced mold temperature control. Finally, the article provides systematic solutions for common defects like sink marks and weld lines, concluding with a look at future trends including nano texturing and self-healing polymers.

